
EBSILON®Professional Online Documentation


The chapters listed here provide information about editing the components, which can be used for almost all objects regardless of their type:
This chapter describes how to create and modify buttons (user-defined buttons).
Buttons are a special kind of text fields but with certain restrictions and certain extensions.
Unlike text fields, the appearance of the buttons (frame, colour, font) cannot be modified. You can only change the text (title). The font size is adjusted automatically to the height of the button. To gain additional space above or below the text, you may use empty lines in the text.
Clicking the button with the left mouse key starts the execution of the action assigned to that button.
To select the button itself, you must click it with the right mouse key (thereby opening the context menu) or use a frame drawn by dragging the mouse while keeping the left mouse key pressed. Once a button is selected, the action will not be executed when you click on the button. You can then move, resize, copy or delete the button.
If the button is already selected, you can double-click it to open the property window for the button. Else, use the command ”Properties…” from the context menu.
The property window consists of two tabs: ”Text” and ”Command”.
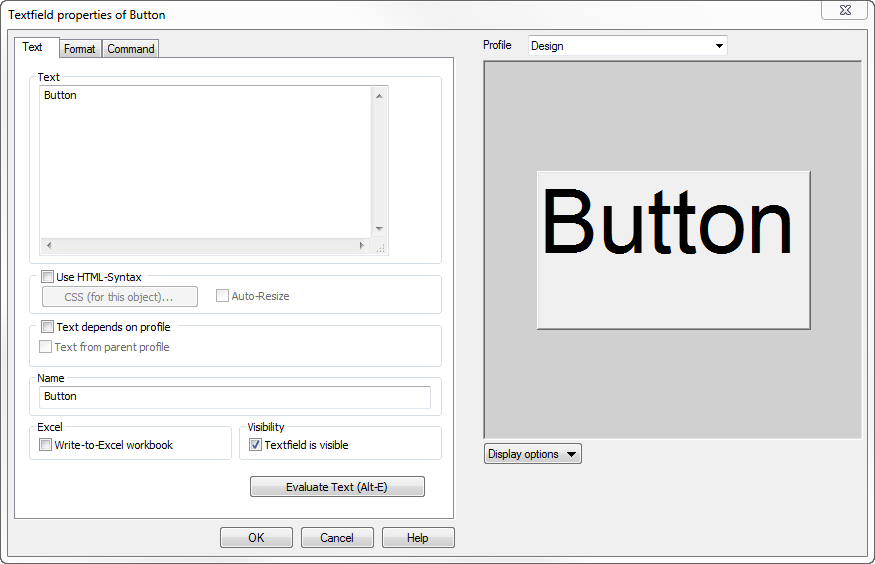
In the tab "Text", the title of the button can be specified. The standard text is "Button”.
An individual style for the button can be specified by means of CCS.
The text can be profile-dependent. Note that the corresponding action is not profile-dependent, but instead is the same for all profiles.
It is possible to access the title of the button via the Standard Excel Interface.
The button can be made invisible. In this case, no action is executed if the button is clicked.
Click on "Evaluate Text (Alt-E)" to make your text changes visible in the preview.
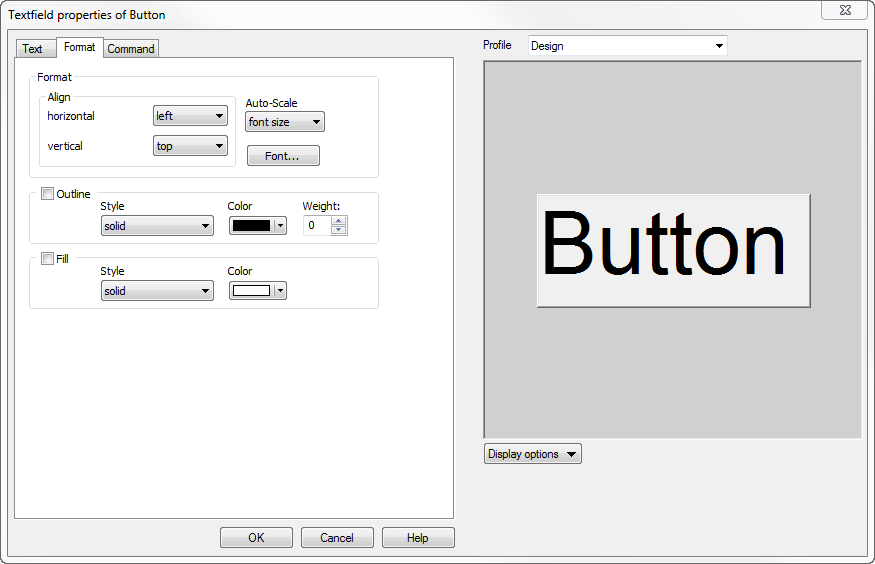
In the area "Align" horizontal or vertical position of the text can be modified.
The size of the button or the font size can be easily adapted by the "Auto-Scale" functions.
In the area “Font” you can change:
The functions "Outline" and "Fill" can be used to match different buttons.
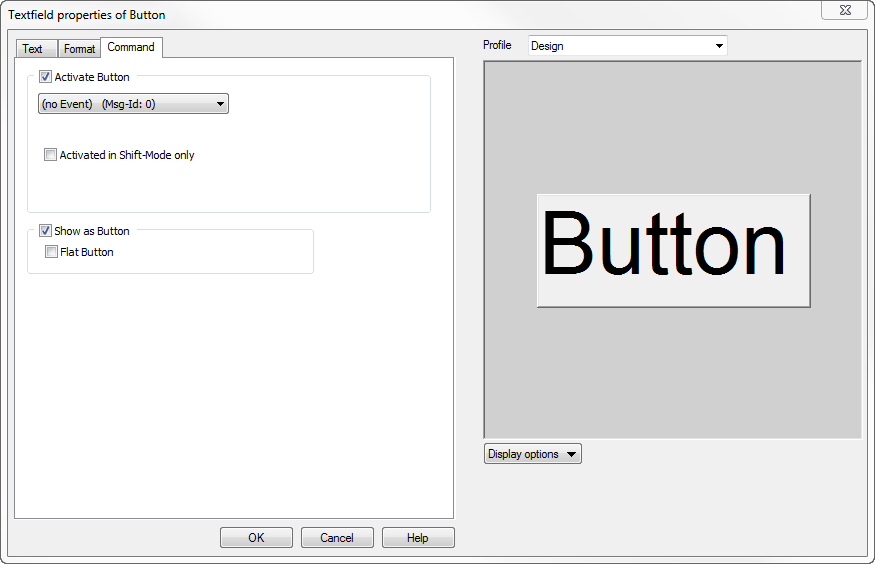
In the ”Command” tab of the property window you can define the action to be executed when the button is clicked. Depending on the action you select in the drop down box, an input field appears where you can specify a corresponding ID or a name.
|
Action |
Default |
Description |
|
(no event) |
- |
No action is executed (default setting). |
|
Simulation |
- |
A simulation is performed for the current profile. |
|
Validation |
- |
A validation is performed for the current profile. |
|
EbsScript |
EbsScript-ID and start parameters (an integer value and a text) |
The EbsScript is executed with the specified ID. The call to EbsScript is performed with the specified start parameters. These parameters can be retrieved in the EbsScript by the function "getStartParameters". |
|
ShiftView |
Control room image-ID |
The screen is reset to the view with the corresponding ID. |
|
ProVis-Multi Trend |
Name of the trends |
The ProVis Multi-Trend diagram with the specified name is opened. |
|
ProVis-XY-Diagram |
Name of the Diagram |
The ProVis XY diagram with the specified name is opened. |
|
Activate First Child Profile |
- |
If the current profile has child profiles, the first of them is set as the new current profile. Else, the current profile does not change. |
|
Activate Last Child Profile |
- |
If the current profile has child profiles, the last of them is set as the new current profile. Else, the current profile does not change. |
|
Activate Parent Profile |
- |
The parent of the current profile is set as the new current profile. If this is already the top-most profile, the current profile is not changed. |
|
Activate Next Sibling Profile |
- |
If the parent profile of the current profile has several child profiles, and the current profile is not the last one of these, the next sibling of the current profile (i.e. the next child of the parent profile) is set as the current profile. Else, the current profile does not change. |
|
Activate Previous Sibling Profile |
- |
If the parent profile of the current profile has several child profiles, and the current profile is not the first one of these, the previous sibling of the current profile (i.e. the previous child of the parent profile) is set as the current profile. Else, the current profile does not change. |
|
Activate Next Profile |
- |
The next profile is set as the current profile, regardless of the hierarchy (it can be child, parent, sibling or whatever of the current profile). If the current profile already is the last profile, the current profile is not changed. |
|
Activate Previous Profile |
- |
The previous profile is set as the current profile, regardless of the hierarchy (it may be child, parent, sibling or whatever of the current profile). If the current profile already is the first profile, the current profile is not changed. |
|
Activate Profile by ID |
Profile-ID |
The profile with the specified ID is set as the current profile. |
|
Activate Profile by Name |
Name of the Profile |
The profile with the specified name is set as the current profile. |
Note that separate licenses are required for EposMonitor and EposProVis.