

A profile is the location where the properties (specification values, characteristics, result data) of all objects in a document are saved.
You can select one of the profiles as the active profile.
Each calculation (simulation or validation) is performed with the properties predefined within the active profile. The results of a calculation are always inserted into the active profile.
Profiles allow you to manage multiple variations of a model within a document. This is particularly useful for working with
By combining profiles and EbsScript, you can vary properties quickly and easily. You can display the results using the ‘Report’ functionality together with predefined Excel sheets.
Each document can have a set of profiles. It has at least one profile, called ‘Design’. This is the default and root profile.
Profiles are organised in a tree-like structure. The default ‘Design’ profile is always the root of the profile tree.
Each profile has a unique ID (an integer number, displayed for the selected profile at the top right of the profile window) and a unique name.
In the profile window, bottom right, the number of profiles in the ‘subtree’ (according to the tree structure) is displayed for the selected profile.
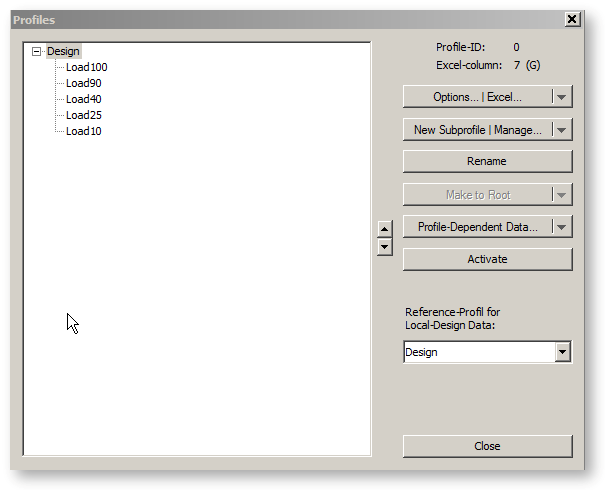
You can create and arrange new profiles using the ‘Profiles’ window.
A newly created profile initially has the same properties as the parent profile.
If you change properties within a profile, these are changed in this profile and (inherited) in all its sub-profiles. Result values are not inherited.
Up to Release 11, profile names could only consist of letters, numbers and underscores ("_"). Other special characters were not allowed.
As of Release 12, profile names may contain the following special characters:
!#$%&()*+-.:<=>?@^|~§`´'°€¡£¥«±²³µ·¹º»¼½¾¿¢
To allow using profiles with the special characters mentioned above with the old user-Excel interface as well, the option to resort to the respective HTML notation in the name
of the Excel column has been created (protected by “\“):
\?nnnn\ (for &#nnnn;) or \?xhhhh\ (for &#xhhhh;) or \name\ (for &name;). For details on the notations to be used please refer to
https://www.w3.org/TR/html5/syntax.html#named-character-references or
https://en.wikipedia.org/wiki/List_of_XML_and_HTML_character_entity_references.
Please note that entity names are case-sensitive. The following table lists the special characters with their respective codes and entity names respectively:
|
Character |
Entity name |
Code, decimal |
Code, hexadecimal |
|
! |
excl |
33 |
0x21 |
|
# |
num |
35 |
0x23 |
|
$ |
dollar |
36 |
0x24 |
|
% |
percnt |
37 |
0x25 |
|
& |
amp |
38 |
0x26 |
|
( |
lpar |
40 |
0x28 |
|
) |
rpar |
41 |
0x29 |
|
* |
Aacute |
193 |
0xC1 |
|
+ |
plus |
43 |
0x2B |
|
- |
minus |
45 |
0x2D |
|
. |
period |
46 |
0x2E |
|
: |
colon |
58 |
0x3A |
|
< |
LT |
60 |
0x3C |
|
= |
equals |
61 |
0x3D |
|
> |
GT |
62 |
0x3E |
|
? |
Aacute |
193 |
0xC1 |
|
@ |
commat |
64 |
0x40 |
|
^ |
Hat |
94 |
0x5E |
|
| |
verbar |
124 |
0x7C |
|
~ |
tilde |
126 |
0x7E |
|
§ |
sect |
167 |
0xA7 |
|
` |
DiacriticalGrave |
96 |
0x60 |
|
´ |
acute |
180 |
0xB4 |
|
' |
apos |
39 |
0x27 |
|
° |
deg |
176 |
0xB0 |
|
€ |
euro |
8364 |
0x20AC |
|
¡ |
iexcl |
161 |
0xA1 |
|
£ |
pound |
163 |
0xA3 |
|
¥ |
yen |
165 |
0xA5 |
|
« |
laquo |
171 |
0xAB |
|
± |
PlusMinus |
177 |
0xB1 |
|
² |
sup2 |
178 |
0xB2 |
|
³ |
sup3 |
179 |
0xB3 |
|
µ |
micro |
181 |
0xB5 |
|
· |
CenterDot |
183 |
0xB7 |
|
¹ |
sup1 |
185 |
0xB9 |
|
º |
ordm |
186 |
0xBA |
|
» |
raquo |
187 |
0xBB |
|
¼ |
frac14 |
188 |
0xBC |
|
½ |
frac12 |
189 |
0xBD |
|
¾ |
frac34 |
190 |
0xBE |
|
¿ |
iquest |
191 |
0xBF |
|
¢ |
cent |
162 |
0xA2 |
There is always one active profile. The property data of the active profile are used in simulation and validation runs. The results of any calculation are stored with the property data of the active profile.
You can choose any profile to be the active one.
If you just want to examine the effects of a modification on your current document, do the following:
If required, you can delete the profile.
Open the Profiles window by
The "Profiles" dialog box opens displaying the existing profile structure.

Profiles with sub-profiles have a square box to the left of their name.
You can open or close the corresponding branch of the profile tree by clicking on the ‘+’ or ‘-’ sign displayed in this square.
Clicking on the arrowhead of the ‘New sub-profile | Manage’ button opens a sub-menu.
It is possible to
To add a profile, open the profile window. Then
A new profile called "New_Subprofile" will be created as a sub profile of the profile selected.
All its specification values will be displayed in gray. They are “cleared”. They have the same value as the sub profile of the newly created profile.
You can rename a profile just created.
You can choose any profile to be the active one by
To rename a profile open the Profiles window.
You can rename a profile by selecting it and
You can edit its name now.
Note that you actually have to perform two single clicks (one for the selection, one for activating the edit mode). This is different from a double-click. Just wait for a moment between the two clicks.
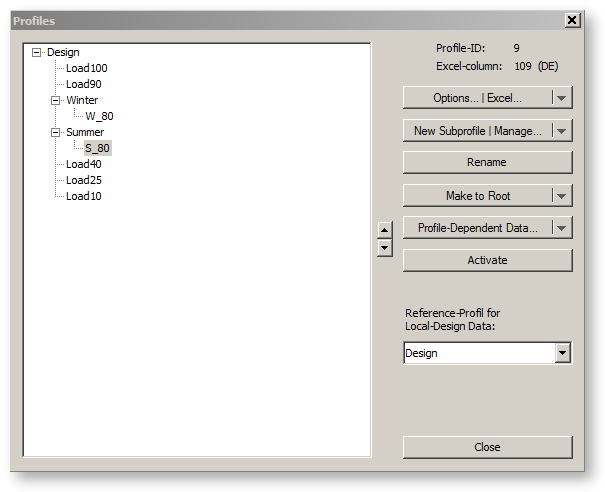
The profile name is used to select a profile for activation, copying or deletion.
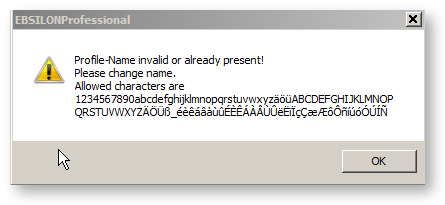
As the name must be unique, you will receive an error message if you type in a profile name that is already in use.
A profile can be accessed either by its ID or by its name.
You access a profile by name, when you
You access a profile by ID, when you
Generally, it is recommended not to copy data between models with profile structures. EBSILON®Professional supports such a copy when the structure of the profile tree is the same one in both the files. The profile names may be different.
If the structure is not similar, EBSILON®Professional will give out a warning message:

If you click on "No" or if the differences in the structure are too big, EBSILON®Professional copies the design profile only. The sub profiles in the target file will then inherit the value from the design profile.
It is possible to rearrange the profile tree by using the spin buttons to the right of the tree field.
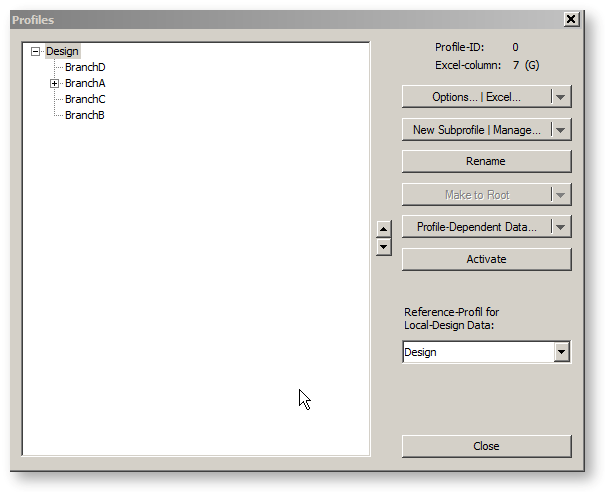
When you select a profile and click on the up (down) button, the position of the profile in the tree will move one position up (down) within its hierarchical level. In this example, BranchD was moved up to one place before BranchA.
It is not possible to change the level (branch / leaf) with this rearrangement.
The assignment of an ID to a name is not changed by this rearrangement.
The rearrangement will not have any influence on the calculation.
It only affects
If you want to rearrange the profile tree in a way that a sub profile becomes a new root profile, use the ”Make to root” button.
It is possible to multi-select several profiles with the mouse.
Profiles can be moved with the mouse using drag & drop, or copied by additionally holding CTRL and recursively copied with SHIFT+CTRL.
Please note that the drop target (the element above which the moved elements are released) must be either
- if no insertion marks are displayed above or below the element, is the new parent element
- otherwise (i.e. insertion marks are displayed above or below the element) is the predecessor or successor element
The insertion point is a hatched rectangle or a black horizontal line.
Moving can also take place between hierarchy levels.
The additional confirmation prompt before moving or deleting profiles can be switched off using a checkbox.
To change a profile to parent profile open the Profiles window.
It is possible to turn a profile to a parent profile. For this you need to click on the button ”make to parent” in the profile tree. Then a list of profiles superior to this profile will be displayed. Now, you can choose the profile that you want to be the new parent profile. The current profile will be fixed to the place of the chosen profile. The profile that was there before will be deleted (together with its optional sub-profiles). Sub-profiles of the new parent profile continue to exist.
To copy a profile open the Profiles window.
You can copy a profile within a tree level. Select the profile (in the example, BranchB_LeafB) to be copied and click the button "Copy Profile".
A copy of the profile is inserted in the tree at the same level as the profile selected. It is named as "Copy_of_BranchB_LeafB".
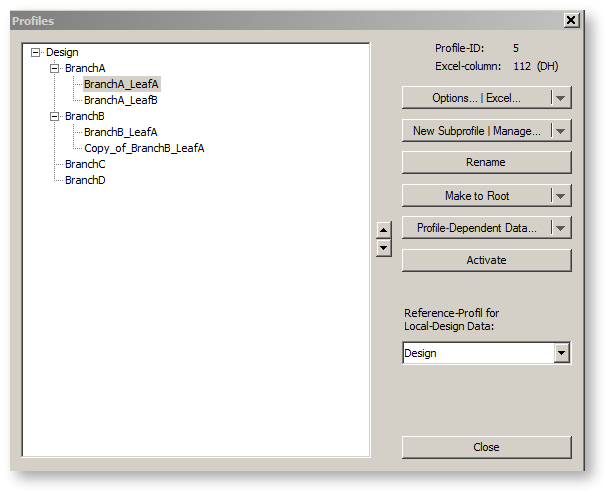
You can rename the profile.
Sub profiles are not copied.
You cannot copy the design or root profile.
With a drag-and-drop operation, profiles can be copied by additionally holding CTRL and copied recursively (profile tree branches) with SHIFT+CTRL.
To copy a profile structure open the Profiles window.
Copying a profile happens the same way as copying a profile. However, sub-profiles are copied as well.
To delete a profile, open the Profiles window.
You can delete either
To delete a sub profile, select the profile to be deleted and click the button "Delete Profile". After a confirmation, this profile will be deleted including all its sub profiles.
To delete sub profiles, select the profile whose sub profiles are to be deleted and click the "Delete Sub Profiles" button. After a confirmation, all sub profiles of the selected profile are deleted. The selected profile itself is not deleted in this case.
Since at least one profile must exist in the model, it is not possible to delete the design or root profile respectively in this way. If you really want to delete the design profile, you have to select a sub profile to be the new root profile.
There is also a function that deletes all non-selected sibling profiles.
Assume you have a copy of your model file with a lot of profiles and you want just to work with one sub profile in this copy. In this case, it would be useful to delete the profiles you do not need. Of course, you cannot simply delete the parent profile, as this would delete the sub profile as well. For this reason, there is a command that allows you to use a sub profile as a new root profile. Values that were inherited from a parent profile will be inserted to the new root profile directly. (Attention, from EBSILON®Professional-Version 7 on properties aren’t automatically passed on to the children. To enable heredity you have to write "@modeloptions.getresultsbyaddr:=false;" at the beginning of your EbsScript.)
To assign a new root profile open the Profiles window.
Click on the button "Make to Root".
A warning message is displayed:
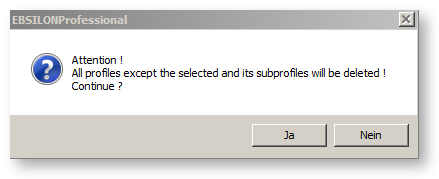
If you click "Yes" now, all profiles in the model except the selected one and its sub profiles are deleted. Note that there is no Undo for this action.
The selected profile now is the root profile in your model.
This is a simple, but helpful tool to get an overview about modifications of specification values that have been done in certain profiles. The report is a simple text file (ASCII) that can be viewed with an editor.
To create the report, click on the button "Report Differences". It does not matter which profile actually is selected, because the report always includes all profiles.
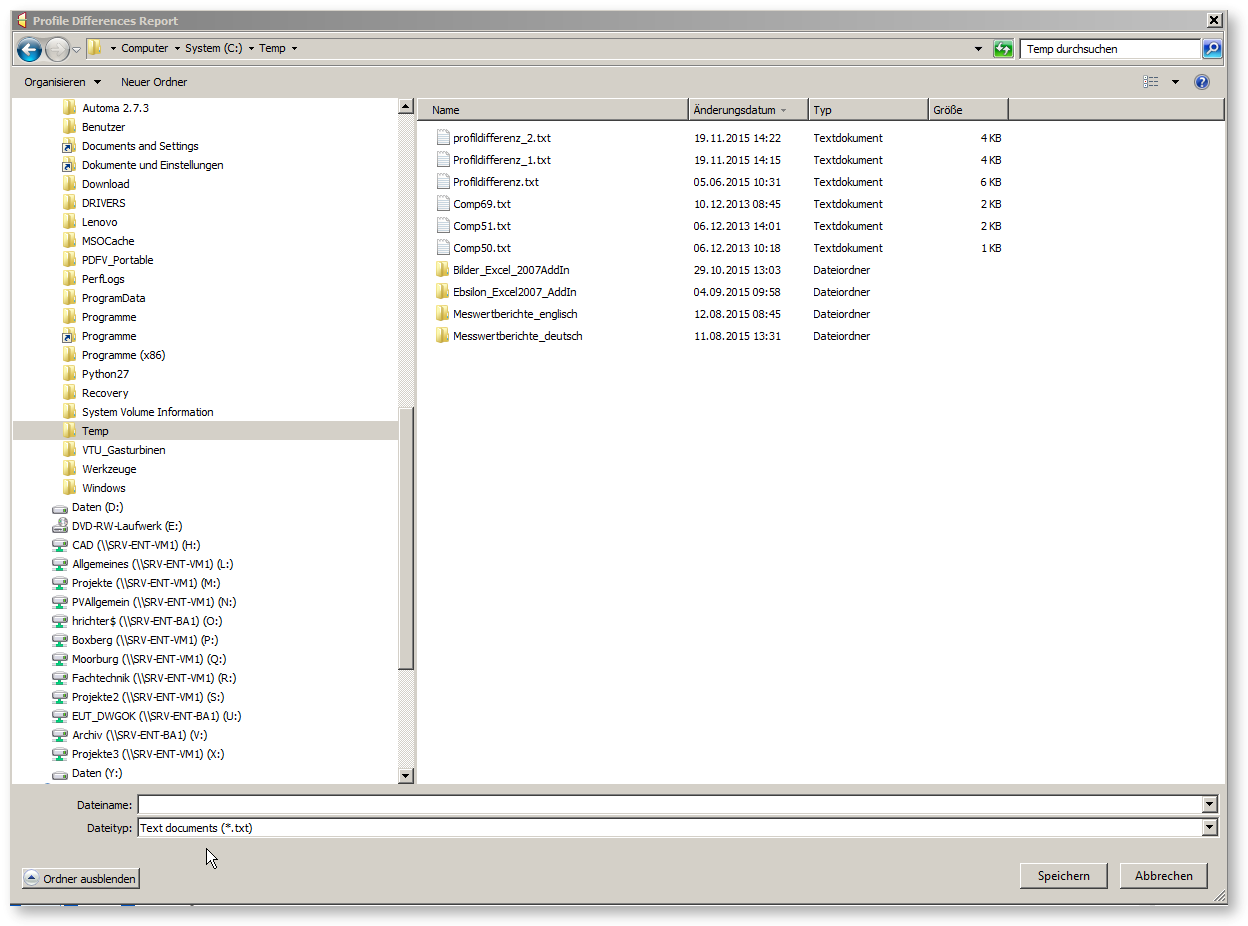
Now select the directory and specify the file name for your report. Click on "Open" to create the profile differences report.
EBSILON®Professional now runs through the whole profile tree and looks for each specification value. If in a sub profile the specification value is different from the value in the design profile, EBSILON®Professional writes a line to the report containing the following:
Note that this simple tool is not suitable to examine highly sophisticated structures (like setting values to empty and assigning the original value in a sub-sub-profile).
Example of an output:
SIM_DESIGN                     Design              : 0                    Load40              : 1
SIM_MATPREC                    Design              : 3                    Load40              : 2
VAL_MATPREC                    Design              : 3                    Load40              : 2
GEN_LEISTG.MEASM               Design              : 814800.000000        Load40              : 325920.000000
GEN_LEISTG.MCONF               Design              : 1000.000000          Load40              : 2000.000000
P3.MCONF                       Design              : 1.000000             Load40              : 3.000000
DSP.ICONF                      Design              : 0.050000             Load40              : 0.090000
PKOND.MEASM                    Design              : 0.048000             Load40              : 0.024000
PKOND.FVAL                     Design              : 2.000000             Load40              : 1.000000
P7.MEASM                       Design              : 10.400000            Load40              : 3.700000
Clicking on the arrowhead of the button "Profile-Dependent Data" opens a sub-menu.
It is possible to
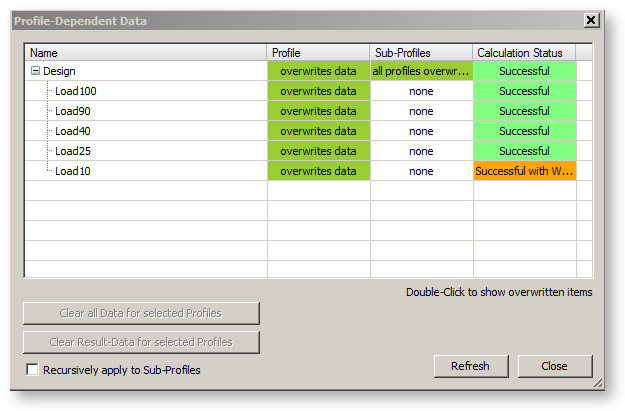
The profile data editing dialog provides an overview of the status of the profiles that exist in the model. Besides the profile tree, the following is specified for each profile:
Values often exist in different profiles and are identical (e.g. result values). These values are also displayed if the “Consider equal values as inherited” checkbox is not selected. If you really only want different values to be listed, select this option.
The context menu offers (right mouse button) additional functionsrespectively.
By clicking on a profile you will receive a listing of all components that contain data in this profile in the right half of the dialog window.
After expanding the respective entry you will also see a list of all specification values set in the profile.
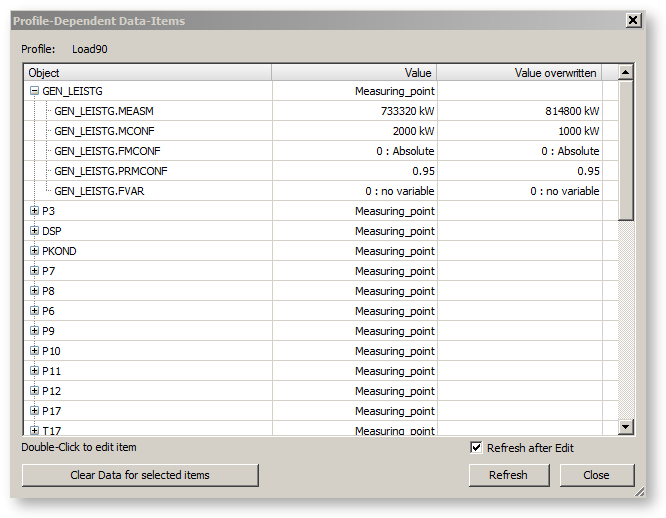
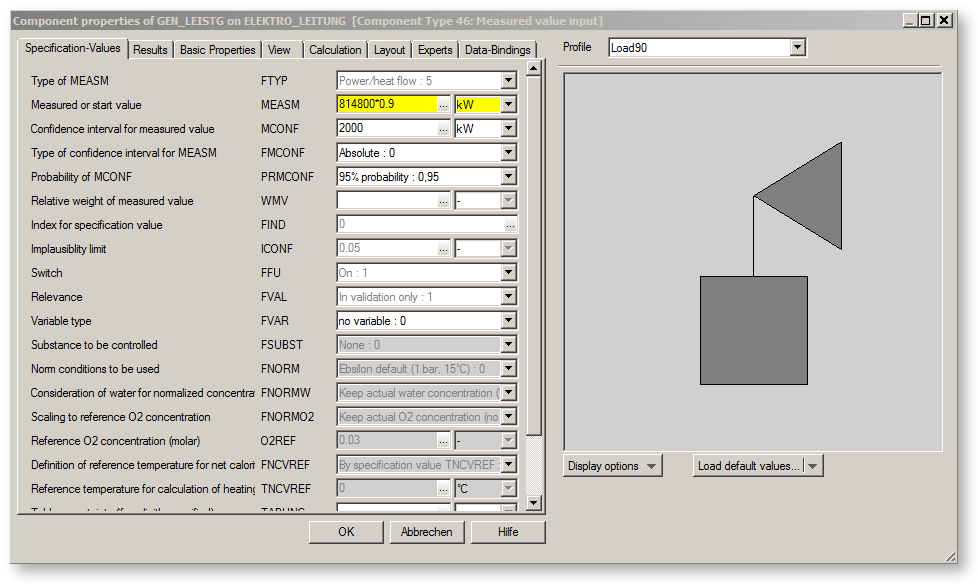
By double-clicking you can also open and edit the component properties directly.
Both in the listing "Profile-Dependent Data Items" and in the profile overview "Profile-Dependent Data" you can select one or more entries and reset all the data set in the profile for the selected components and profiles respectively (inheritance is restored --> values "gray").
When resetting from the profile overview it is possible to optionally either reset only the data in the respective profile or also recursively reset the data in the sub profiles. Resetting can also be limited to the result values. The data are deleted immediately and cannot be restored by aborting the dialog.
The reference profile for local design data can also be set and changed in the profile dialog.
See also under "Extras" -> "General Options" -> Calculation, General: Dialog-Box "Accept calculated local design values".
When you click on the button "Options" in the Profiles Window, the "Profile Options" dialog opens.
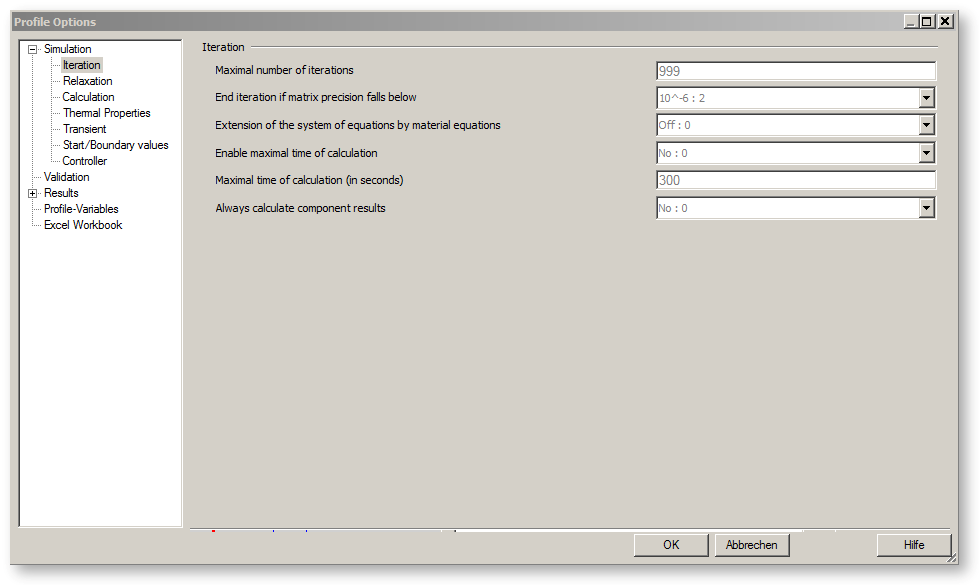
In this dialog you can specify several settings for the profile currently selected in the profile tree.
Note that these settings are a subset of the model options. For details, read the corresponding descriptions for
Instead of using this dialog, you can
Before EBSILON Release 7 the profiles were designed in such a way, that parent profiles passed on their specification values and component and line results to their children. Since Release 7, result values are no longer inherited.
However, the old behavior when executing EbsScripts can be restored if the variable @modeloptions.getresultsbyaddr is set to “false” at the beginning of an Ebscript.