

The chapters listed here provide information about editing the components, which can be used for almost all objects regardless of their type:
The dialog for configuring value crosses has been completely revised.
The content is arranged in two tables, one for the left and one for the right column each. The positioning of the values can be changed by selecting one or more lines
and dragging them to the desired position, both within a table and from one table into the other one.
There is a new option to select the unit for each individual entry as well as a desired text variant, provided that several text variants exist for the unit. New entries can be added by opening a combo box by clicking on the text “Click to insert item…“. Entries can be removed by means of the “Delete” key.
Value crosses are a special kind of text fields. The special feature is a connection to a component or a pipe. It is possible to switch between the classical value cross display and a text field display.
In the classical value cross display, the cross can display the
of dedicated specification values of one pipeline or component.
Each value cross comprises of
The size of the value cross is calculated from the font size and depends on it. To change the font size, which is the same as changing the size of the value cross,
You can change all the properties of the value cross (font, colours, data to be displayed, position, orientation, …).
In the display mode as a text field, you have all options that are available for text fields. Additionally, it is possible to use the expression "$" as a placeholder for the name of the name of the component or pipe that is referenced by the value cross. This helps to avoid errors when you rename or copy objects.
Select a value cross to be inserted and then proceed as follows:
Move the mouse pointer over
This is the default look of a value cross connected to a steam pipeline:
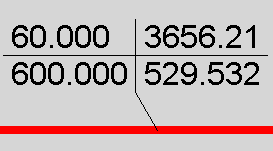
The four specification values Pressure P, Temperature T, Enthalpy H and Mass Flow M are displayed in this order:
|
P |
H |
|
T |
M |
The following are the default properties of a value cross depending on the object type it is connected with.
|
Object Type |
Border |
Attribute |
Grid |
|
Pipe |
No |
P, T, H, M |
Yes |
|
Component |
Yes |
Nothing |
No |
You can change all properties of a value cross (font, colours, data to be displayed, position, orientation, …). Given below is an example of a value cross showing data of 12 identifiers of a steam pipeline with a special font, special colours and special line styles.
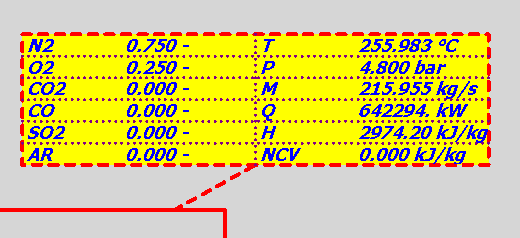
There are several ways to open the "Value Cross Properties" window:
The left part is used to edit the properties of the value cross. It displays the cross’ properties in five different tabs, namely:
The right part displays the cross as it is placed in the document.
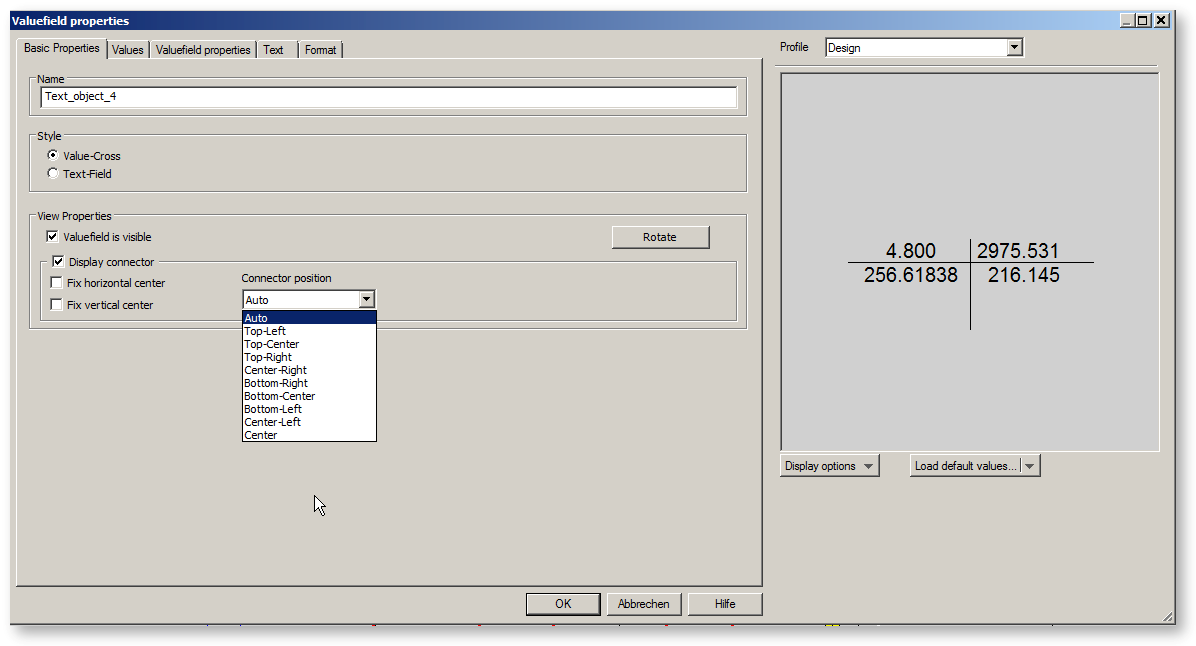
Every value field / value cross need must be named. EBSILON gives default names which consists of "Text_object" and a number. You can rename value fields under Basic Properties → Name.
You can switch the style between Value-Cross and Text-Field. If "Value-Cross" is chosen, the values, which are defined in the tab "Values" are shown. If "Text Field" is chosen, the text which is written in the Tab "Text", is shown.
By clicking the ”Rotate” button you can change the orientation of the cross from horizontal to vertical and vice versa.
There are three buttons in the lower part of the window:
This dialog is used to display and change the data properties of the cross selected.
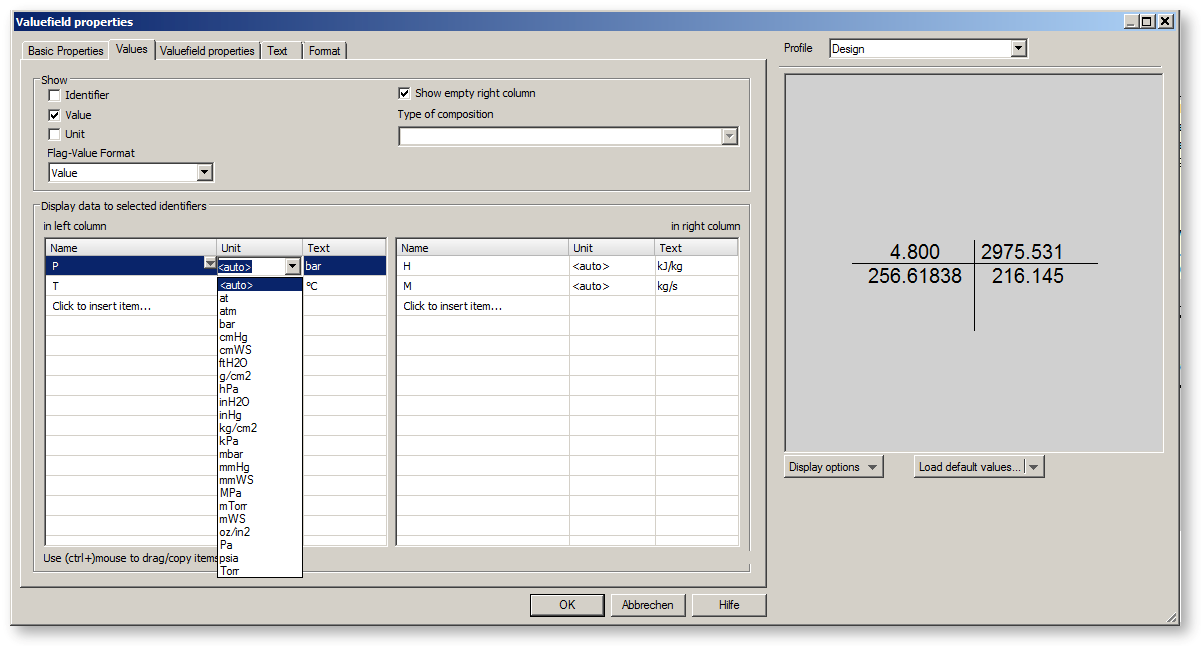
The ”Show” field is used to determine the display of the data in the individual fields of the value cross. Select one or more check boxes from the following:
The checkbox ”Show empty right column” is enabled, if there is no identifier listed in the right column.
In the case of coal it is possible to switch the type of composition between
The area ”Display data to selected identifiers” is used to define,
is displayed. The column ”name” lists the identifiers of all specification values, which will be already shown in the value cross. Click "Click to insert item" in the left column to insert a new value in the left column by the opening identifier list. The identifiers listed depend on the object, with which the cross is connected. To insert a value in the right column, choose "click to insert item" in the right column
To remove a value from the value cross, click the right mouse button on this value in the cell and choose "delete".
To change a Unit of a value, click in the "Unit" cell of that value and choose a unit from the list. To change the notation of a unit, click in the "Text" cell of that value and choose a notation from the list.
This dialog is used to display and change the display properties of the cross selected.
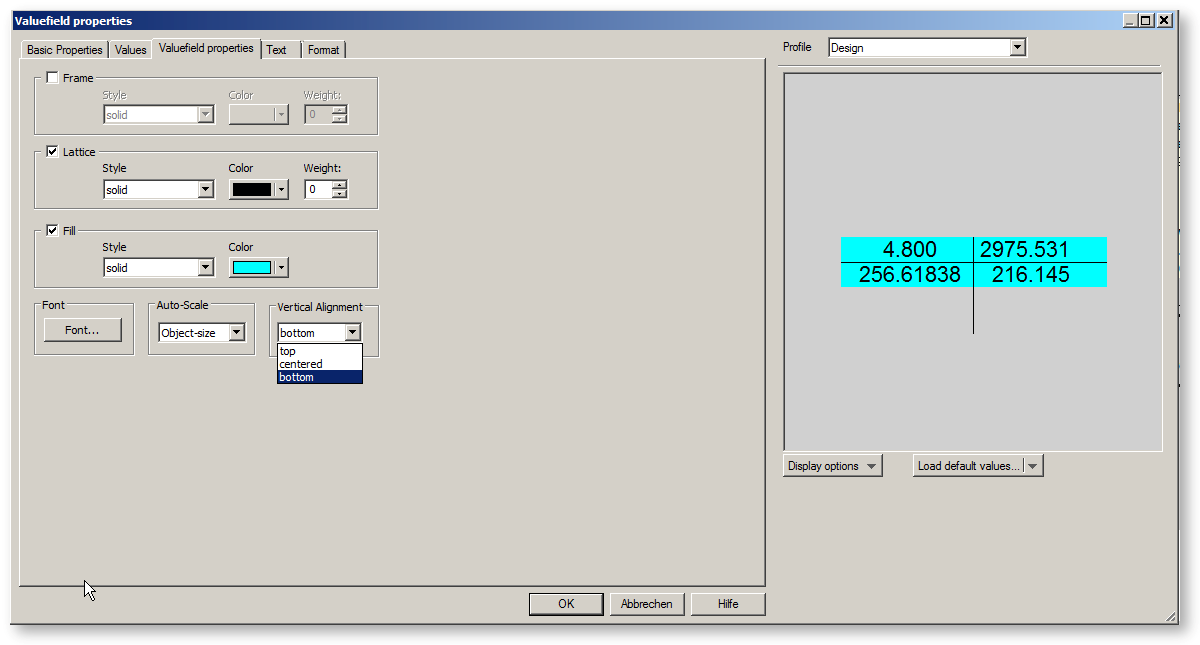
Within the ”Frame” area you can change the
of the frame line.
Within the ”Lattice” area you can change the
of all lines of the value cross except the connectors and the frame.
Within the ”Fill” area you can change the
of the background of the frame.
Clicking the ”Font” button opens a window, where you can change the font (colour, size, …), in which the identifiers, values and units will be printed.
Use the ”Display Connector” check box to specify, if the line connecting the value cross with a pipeline or component will be displayed or not.
You can modify the properties of all or of a subset of value crosses all at once.
To display the ”Rescale Value Crosses” window, select the command ”Edit --> Rescale Value Crosses” from the menu bar.
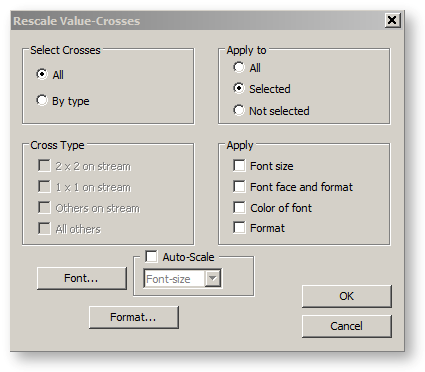
First, select the desired subset of value crosses you want to modify. In the area ”Select Crosses”, click the entry ”All” to modify all crosses, or the entry ”By Type” to modify a subset.
You can specify this subset by activating one or more entries from the ”Cross Type” area. ”All Others” means all value crosses connected to components. ”2x2” and ”1x1” imply the value crosses connected to pipelines with two identifiers in both columns or crosses with one identifier in one column respectively. ”Others on Pipe” means all other value crosses connected to pipelines.
In the ”Apply to” area check one of the three boxes: All, Selected, and Not Selected.
The intersection of all these entries together defines the subset of crosses, which will be affected.
Now define the properties to be changed in the ”Change” area:
Now define the desired font and the desired format. Press the button ”Font...” to define the new font properties. Press the button ”Format...” to define new Value Field properties.
Click on the "OK" button to save the changes made. Else, click on "Cancel".
You can move a value cross (or the end of its connector) from one pipeline to another one without loosing any properties specified.
If you move a value cross (or the end of its connector) to a component, the lists of identifiers selected for display will be lost, as soon as the connection to the component takes place.