
Filters enable you to change the visibility of objects in the model depending on particular criteria. Objects can take on the following conditions:
Filtering only affects the display but not the calculations.
The conditions ”visible” and ”invisible” can be set in the property window of each object. The following relationship to the filters has to be considered:
Definition and application of filters is done using the icon ”Filter”, right to the icon ”Show All”. By clicking on the filter icon, you switch the last used filter, that is, it will be activated if it was deactivated before and conversely.
You can switch to another filter or define a new filter by opening the menu beside the filter-icon. In this menu all the available filters are listed. If a filter is active then it is check-marked. You can switch the filter by clicking on it.
By clicking on ”Edit Filters” you call the ”Edit Filters” dialog.

This dialog contains on the top a list of all available application-wide and document-specific filters on the top.
An application-wide filter is available in every model opened on the given computer. It doesn’t contain any model specific filtering criteria.
A document-specific filter is only applicable for the given model. It may contain model specific criteria.
By clicking on ”New…” you have the choice of document-specific or application-wide filters.
In the fields Name and Description you can enter the name of the filter (to be displayed in the Filter combo box) and a description, if necessary.
You can define filters by using layers. A layer includes objects that should be switched together. You can assemble the filter by selecting the desired layer in the list of ”Available layers” on the left side and then clicking on the ”>” key to add the layer to the list of ”Layers to be used” on the right side.
To remove layers used in the filter, select the respective line in the list to the right and click on the ”Delete” key.
After that you have to choose for each layer in the list on the right how they are to be displayed. You have the following choice:
if an object is included in several layers, the order of layers determines the representation. The object is displayed according to the first condition assigned to it (in top-down processing). The order of the layers can be changed via the arrow buttons right to the list.
The following layers are predefined for all models so they can be used both in application-wide and document-specific filters:
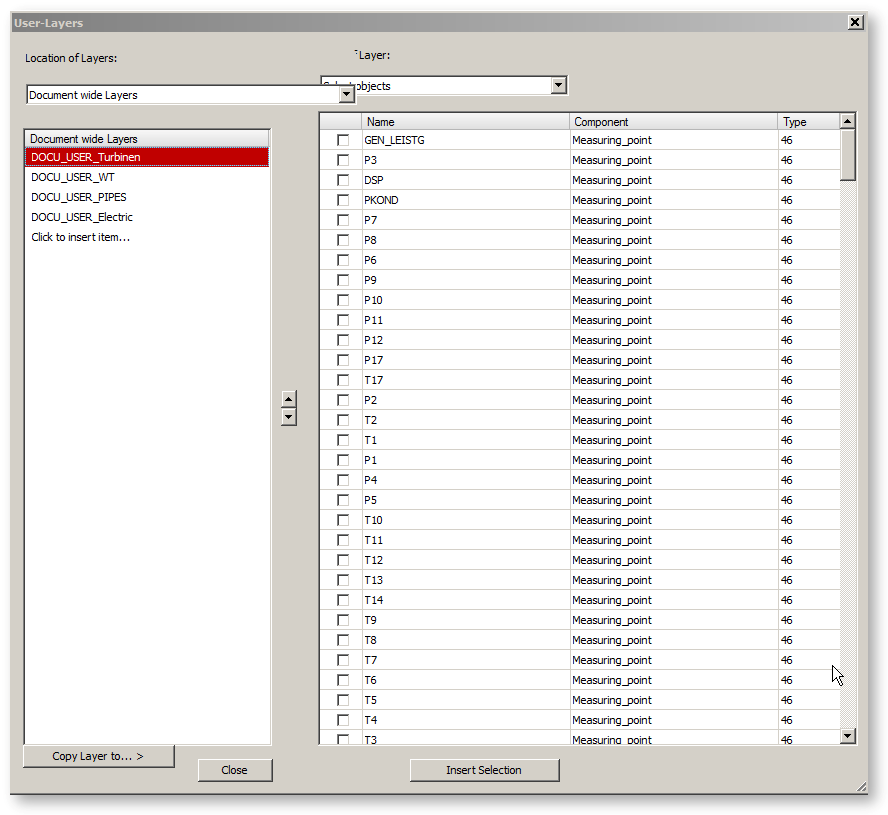
To define your own layers, use the button ”Edit Userlayer…” to open the following dialog:

Just like filters, layers can also be defined as document-specific or application-wide. Document-specific layers are saved in the model file and are only available in the respective model. Application-wide layers are stored in the Windows-Registry and are available in all documents opened on the respective computer.
The button ”Copy” makes it possible to make a layer defined in a document available application-wide (for this mark the document-specific layer and click on ”Copy”) and to adopt an application-wide layer in a document (e.g. to send it to another user).
There are two ways of defining a layer:
Filtering by objects is only possible for document-specific layers, while filtering by expression for all layers.
To define a new layer, click on the entry ”Click to insert item…” in the appropriate table (application-wide or document-specific) and then you can edit the name of the layer.
In the case of document-specific layers you can switch the list box on the top-right between ”Filter by objects” and ”Filter by expressions”.
If you choose ”Filter by objects”, a list containing all available objects in the model will be displayed in the dialog:

After that the appropriate objects in the list can be added to the layer by clicking on the respective check box. Alternatively, you can take over all objects that were selected in the model via the button ”Add selected”.
To filter by expressions, you should first choose the type of objects to be dealt with:
Afterwards an expression in EbsScript-syntax can be entered that should be applied to these objects. If this expression is not ”false” or 0, the respective object will be added to the layer. In this expression ”$” is substituted for the name of the object. For example
$.m < 1
addresses all pipelines with a mass flow of less than 1 kg/s. This way you can compose a filter that display all minor pipelines in gray colour.