
EBSILON®Professional Online Documentation


EbsHTML is a tool that converts an EBSILON®Professional model in an HTML file. The model is displayed graphically when viewed in a browser; default and result values are visible in tooltips when a component or line is touched with the mouse cursor.
This is useful if you want to publish your EBSILON®Professional model to customers who do not have EBSILON®Professional Ebsilon by themselves, or who are not supposed to make modifications in the model. For using this tool, an additional license is required.
The resulting HTML document includes
To convert your EBSILON®Professional model to HTML, use the menu command "FileàExportàEbsHTML". The “EBSILON®Professional to HTML-Converter" window appears:
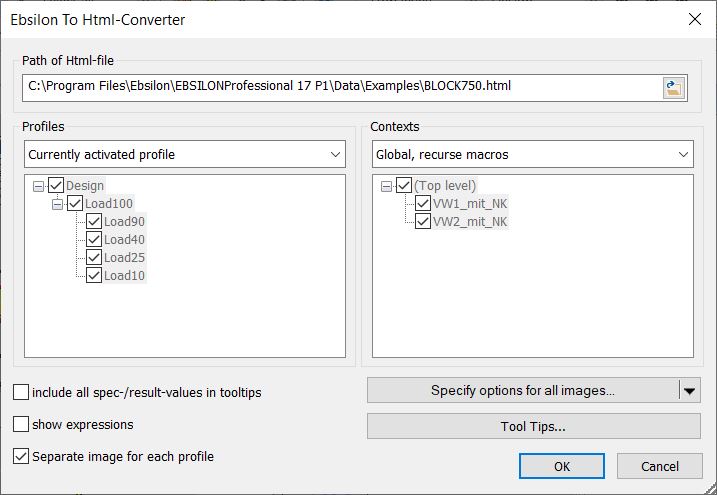
If you do not want to use special settings, you can just click "OK" at this point. By default, the ".html"-file that will be created will get the path and the name of the model. It will include all objects that are visible on your screen and include all values that are displayed to you on the screen in the tool tip windows. The HTML code will fit to standard browsers like Microsoft Internet Explorer, Google Chrome or Firefox.
If you want to change the default settings, you may
By default, tool-tips are applied the same way in HTML-export as they are shown on the display. However, you can give here another definition:

This tool-tip dialog allows to specify settings for each single component (in the General Tool-Tip dialog, the settings are made for component types). On the left side, you find the list of objects that are available in your model. When you select an item, the specification and result values for that object are listed in the region “Corresponding values from tool-tip window” on the right side. In this list, you may activate all items that you want to be included to the HTML file. In this list, a multi-selection is possible: clicking with the left mouse button while the CTRL-key is pressed adds (or removes) single items to the selection. When the SHIFT key is pressed, the whole region from the last selection to the current is selected.
Use the buttons in the "Reset to default assignment" region to reset the tool tips to the original values, either for the selected objects only (button "Selected object") or for all objects (button "All objects"). This way the original settings are restored. The button “Delete All” eliminates all values.
If you are finished with your settings, click "OK" now. After a while, the "Resize" window will appear:
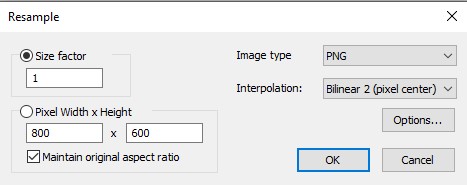
In this window, you have to specify the graphical resolution (in pixels) that shall be used for your picture. As long as the "Keep Aspect" check box is activated, you can either type the width or the height. Alternatively, you may use the sliders to select the size. If you release "Keep Aspect", you picture may be distorted (cycles may become ellipses).
The graphics within the HTML file will be stored as a JPEG, PNG, BMP, GIF or TIFF file, due to the Image Type you select.
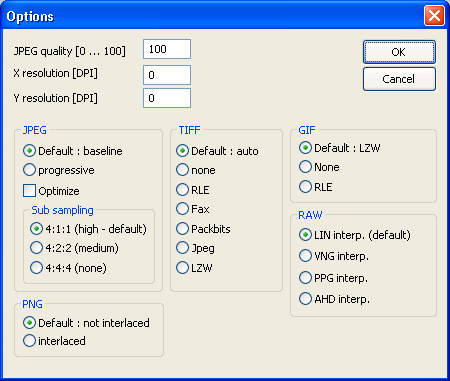
You can modify the type (JPEG 24-bit or JPEG 8-bit, gray), the sub-file type and the Q-factor or other settings for other graphic formats.
When you click "OK", the "Save File" dialog opens for this file:
If you click on "Save", the HTML and the JPEG file will be created. You can open them with your browser.
If you activate the check box “Export macros recursively”, a dialog opens for setting the size and location of each macro separately.
If you want to pass on the HTML-file, note that you have to relay not only the HTML-file but also the related pictures (Je. g. PG-files) and the potentially subordinated macro-files (HTML and e. g. JPG).