
To get a quick access to certain commands, you can define keyboard shortcuts. In this case, a keystroke is sufficient to execute the command.
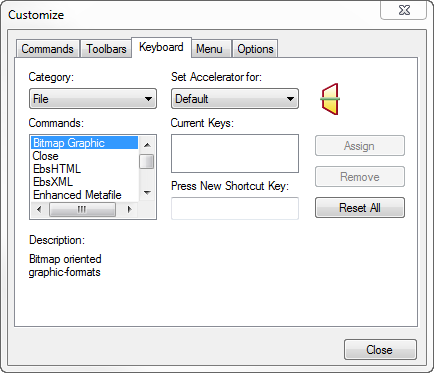
For defining the keyboard shortcuts, use the menu ”Extrasà Customization” à sheet "Keyboard".

In this tab "Keyboard", there is the ”Category” combo box. This box contains the names of the EBSILON main menus. If you select one entry, all submenus are displayed in the commands list. If you select a command in this list, the list ”Current Keys” on the right displays the keys already assigned to this command.
If you want to assign a new shortcut key, click in the field ”Select New Shortcut Key” . Now any keystroke is displayed in this field (even ”SHIFT” etc.). If the keystroke is already assigned to a command, this command is displayed below ”Currently affected to:”. Click on ”Assign” to assign the specified keystroke to the selected command. The new key is added to the ”Current Keys” section.
To remove a keyboard shortcut, select it in the ”Current Keys” list and click on ”Remove”. With ”Reset All”, you can reset all shortcuts to their original values.
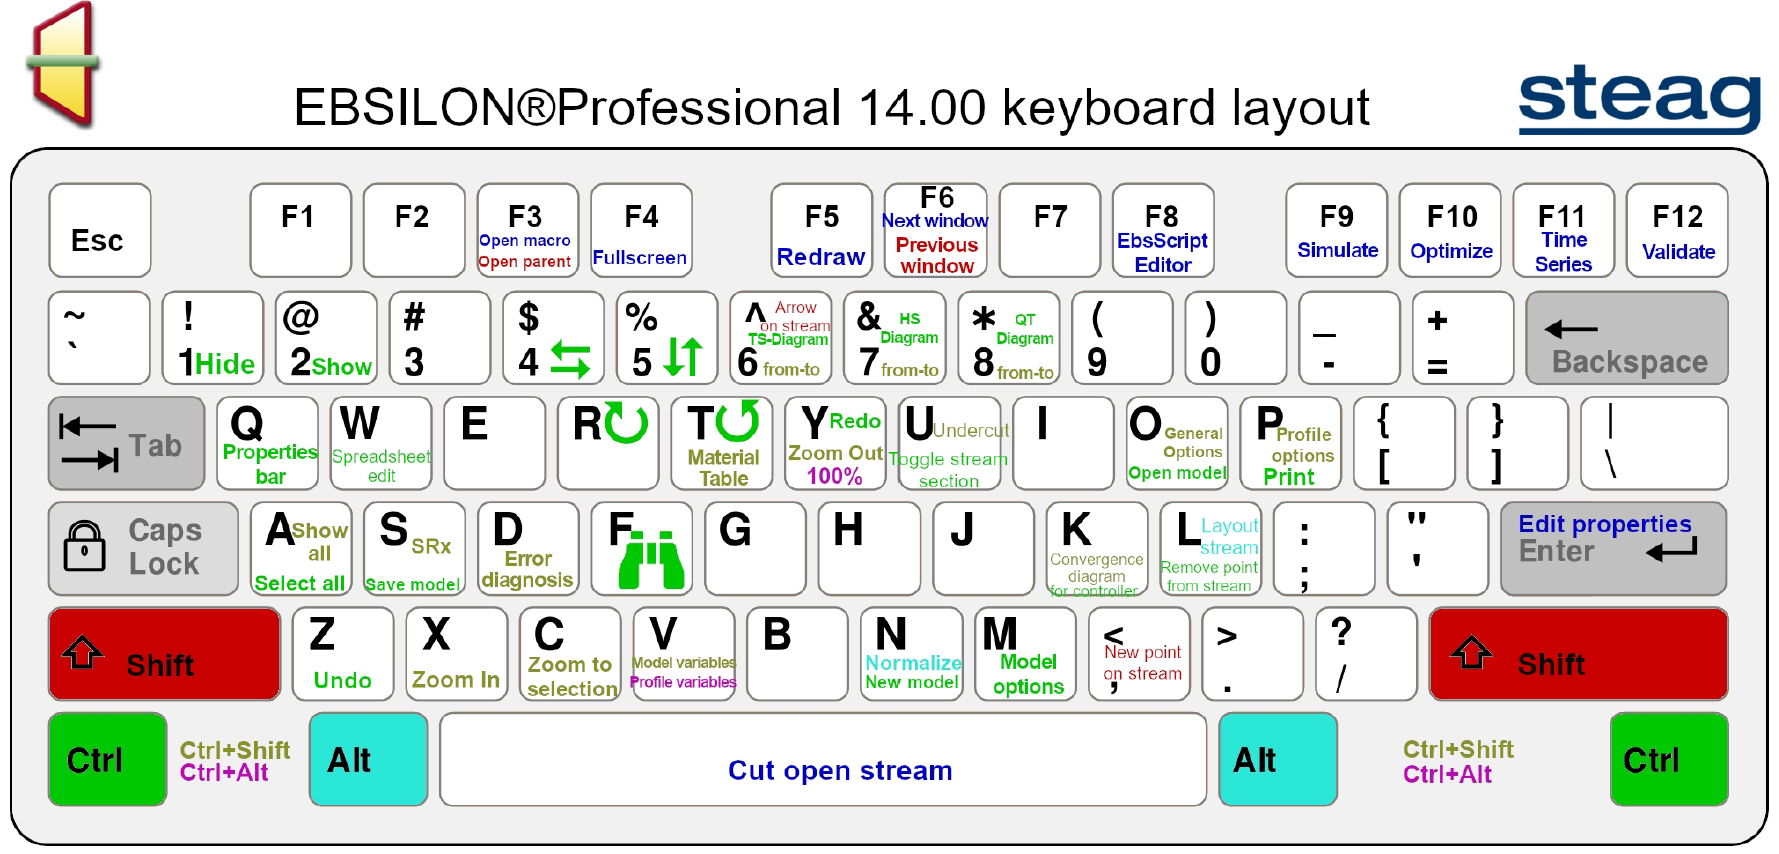
Keyboard shortcuts have been developed for many inputs. E.g. you can directly open the model settings (with the entry opened last) with CTRL-M, with CTRL-7 you can display an HS diagram for the selected components, with F12 run a validation, and much more. It is shown in the respective menus which shortcuts are allocated to the individual commands. In addition, there is an overview under Help à Keyboard layout
Under View à Toolbars à Adjust it is possible to create own keyboard shortcuts.

When "customizing" the menus/toolbars (Extras -> Customize…), commands for inserting macros can be selected in the "Customize" dialog under "Commands/Categories".
User-defined commands can be added to menu items and toolbar buttons in the user interface.
To insert a user-defined command, select "Customize" in the menus/toolbars (Extras -> Customize...).
In the "Customize" dialogue under "Commands/Categories", select "New Command".
The "Commands" window will then also display "New command", which you can drag and drop onto a toolbar or into a menu.
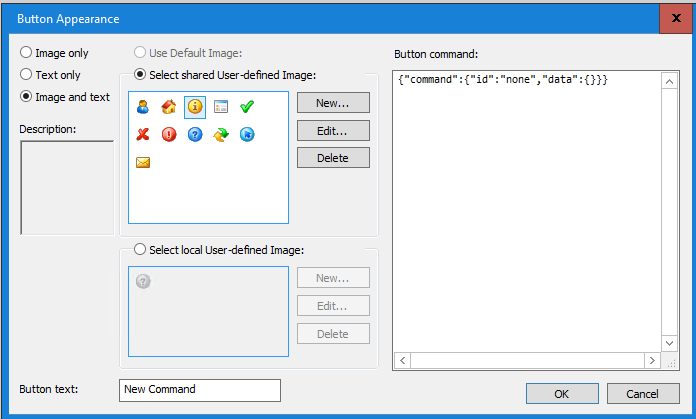
Now activate the context menu on the newly inserted button/menu item and select "Button appearence...".
In addition to the name and image, there is now also a "Button command".

The command to be executed is specified here as JSON coded. The following syntax/keyword is used here:
Possible Commands:
|
command-Id |
data |
Effect |
|
none |
No effect |
|
|
simulate |
Execute simulation | |
|
validate |
Execute validation |
|
|
ebsscript |
{"argument":ID, "param_int":Integer-Wert,"param_string":"String-Wert"} |
Execute EbsScript with given ID |
|
shiftview |
{"argument":ID} |
Launch control room view |
|
provismt |
{"argument":ID} |
Provis Multitrend |
|
provisxy |
{"argument":ID} |
Provis xy-Trend |
|
provismultitimetrend |
{"argument":ID} |
Provis Multitime trend |
|
proffirstchild |
Activate first child profile |
|
|
proflastchild |
Activate last child profile |
|
|
profparent |
Activate parent profile |
|
|
profnextsibl |
Activate next sibling profile |
|
|
profprevsibl |
Activate previous sibling profile |
|
|
profnext |
Activate next profile |
|
|
profprev |
Activate previous profile |
|
|
profid |
{"argument":ID} |
Activate profile with given ID |
|
profname |
{"argument":"Name"} |
Activate profile with given name |
|
provistrend |
{"argument":ID} |
Provis Trend |
|
ebsscriptextern |
{"argument":"Pfad", "param_int":Integer-Wert,"param_string":"String-Wert"} |
Execute external EbsScript |
|
insert_partial_model |
{"tag":"Tag-Name", "name":"Makro-Name"} |
Insert partial model/macro |
|
ebsscript_direct |
{"code":"EbsScript-Code"} |
Execute specified EbsScript code |
|
open_model |
{"path":"Name/Pfad"} |
Open model with given name/path |
|
open_context |
{"context":"Name"} |
Activates the specified context in the active model |
|
multi_command |
{"data":[ {Befehl},... ]} Wobei jeder {Befehl} folgendermaßen strukturiert sein muss:
} |
Execures several commands. The fields "on_error_continue", "on_success_continue" and "negate_command_result" control the execution of several commands and are all optional. Das Feld "on_success_continue" has true as default value. The fields "on_error_continue" and "negate_command_result" have false as default value. |
Example: Command for inserting the Ebsilon macro "Diagnosis_Coloring"
{
 "command":
    {
        "id":"insert_partial_model",
        "data":{"tag":"Ebsilon","name":"Diagnosis_Coloring"}
    }
}