

You can use plot frames if you want to create plot that do not just simple show your cycle but have an individual style, e.g. show your name or you’re the logo of your company and other information. Of course it is possible to include such elements to the model itself. Defining them in the plot frame has the advantage that they
To create a plot frame, open the "FileàPrint Preview" menu. The print preview appears:
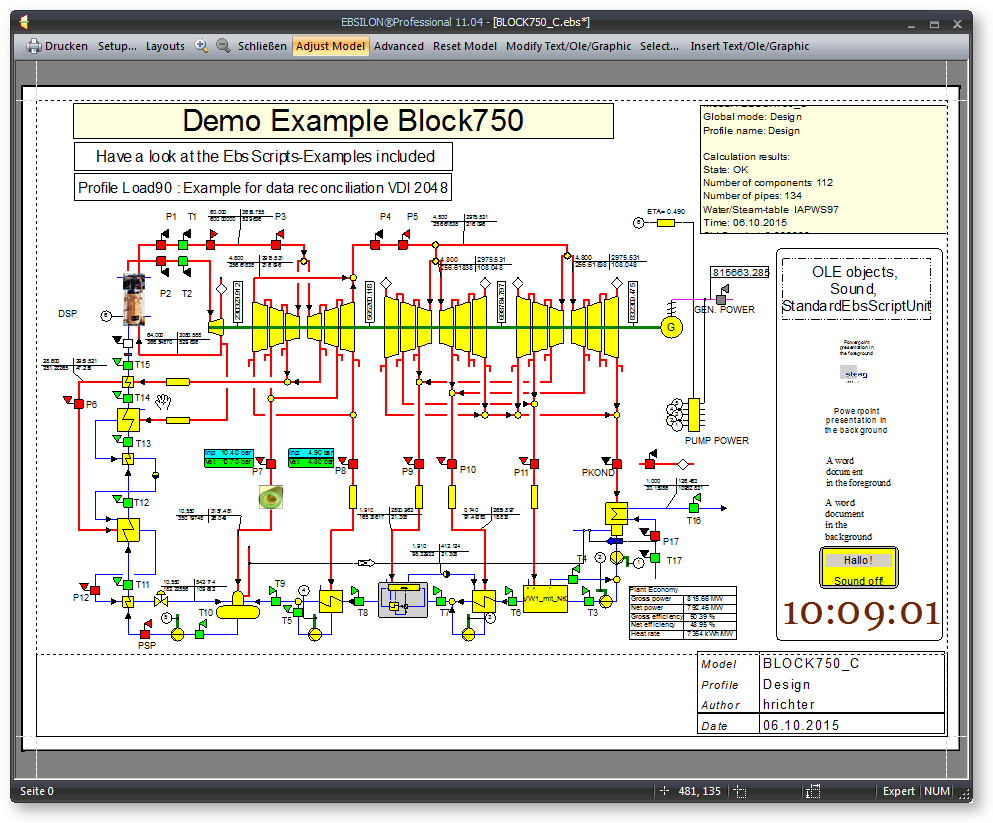
Depending on your currently selected printer, the picture may look slightly different. If your printer does not support colours, your print preview will be black and white.
The print preview consists of
These additional graphical elements are missing if you start with an empty layout.
Generally, there are two working modes:
These modes correspond to the three groups of buttons:
When the print preview is opened, EBSILON®Professional tries to fit the model to your paper size. As the screen format and the paper format differ, it is always a compromise whether to construct a model that is fitting well on the screen or on the paper.
There are certain ways how you can improve the arrangement of the model on the paper. Note that the "Adjust Model" button has to be activated to perform these actions:
In any case, the "Restore Model" button can be used to restore the original settings for the size and position of the model.
When you activate the "Advanced" button, there are even more possibilities to fit the model to the paper. A "Model Scaler" window is opened:
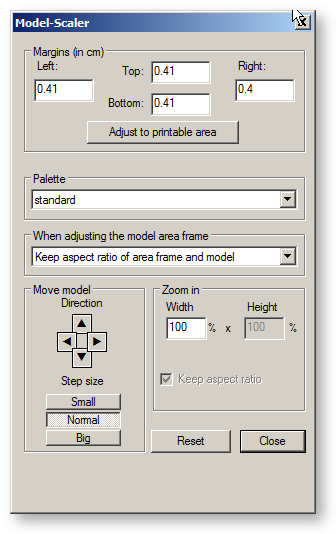
In the upper field, there is a drop down box that allows to modify the behaviour when the model area frame (that is the dashed frame that surrounds the picture of your model) is modified. There are three settings:
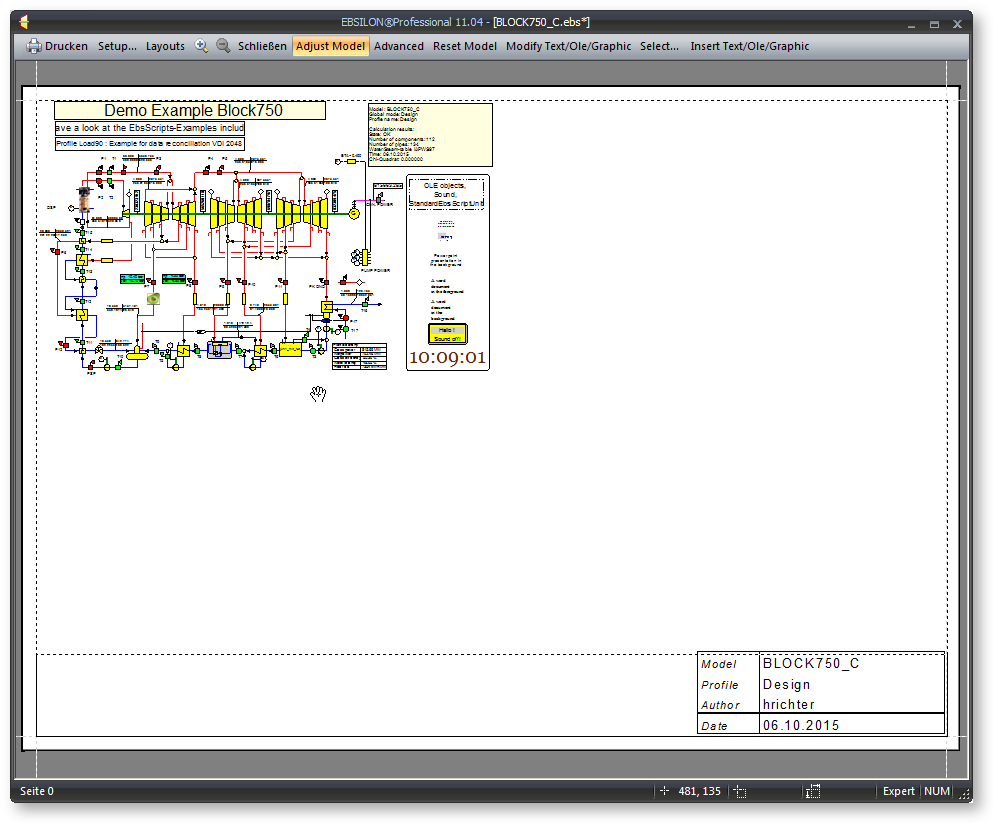
The first one is the default setting. If you change one size of the area frame (e.g., you decrease the height of the frame), the other size of the frame (here: the width) will be changed by the same ratio. The frame and the picture will look like before, only smaller or larger:
The setting "Release aspect ratio of area frame" allows to modify the height and the width of the frame independently. But it does not change the aspect ratio of the model itself. Therefore, sections of the model are cut-off, either vertically or horizontally:
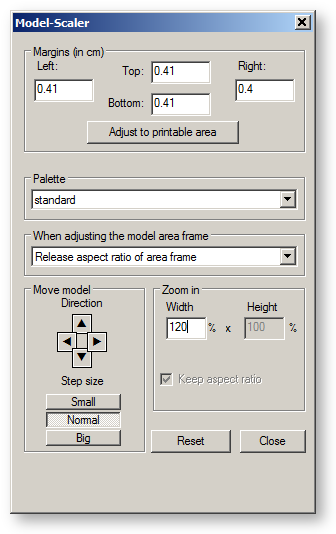
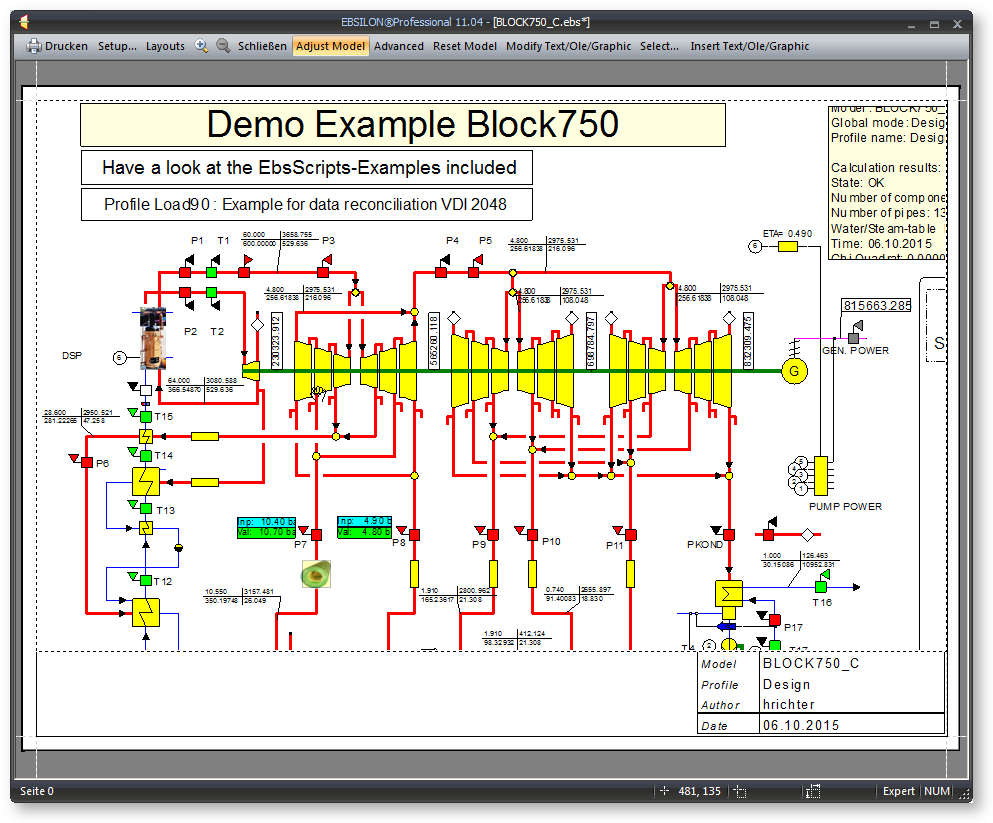
The last setting "Release aspect ratio of frame and model" allows you to modify height and width of the frame independently as well, but keeps the contents of the picture. Note that this feature may result in a deformation of your picture (cycles became ellipses):
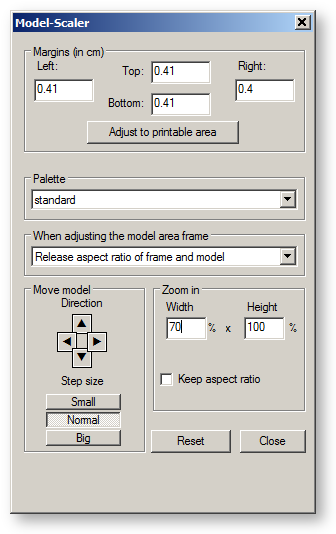
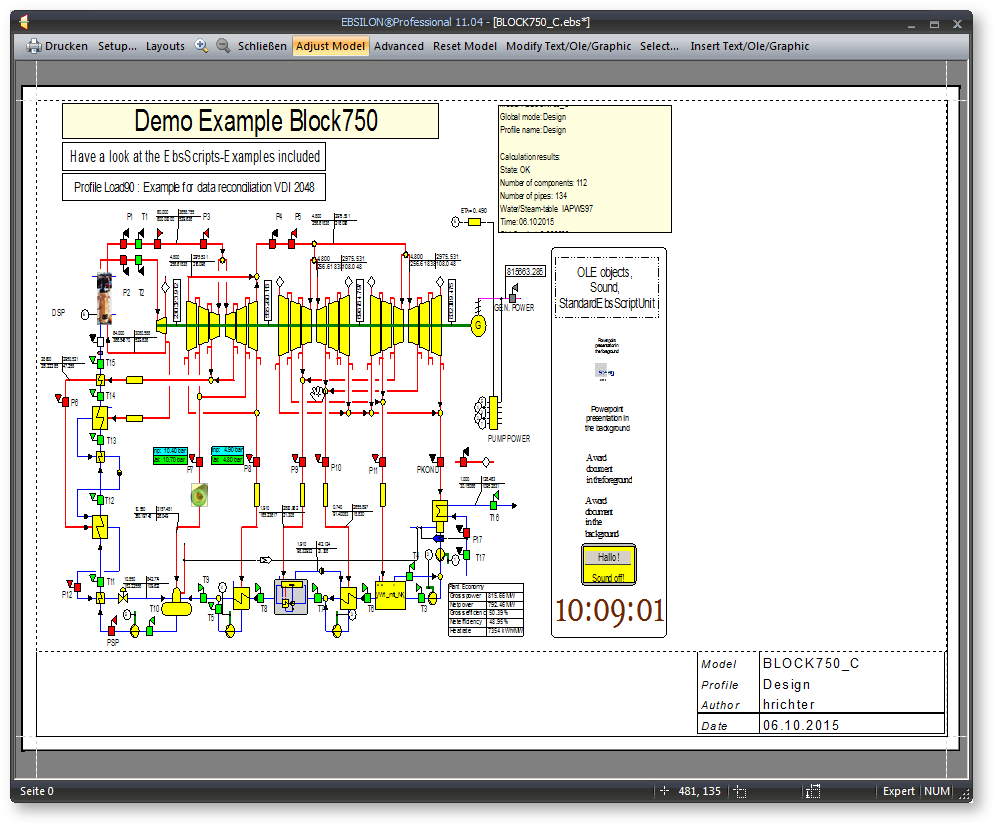
The "Move Model" section of the Model Scaler is used to position the model within the (dashed) area frame. This is helpful if certain lines are lying just on the edge and therefore will not be printed. First, you select a step size ("small", "normal" or "big"), then you use the arrow buttons to move your picture. Note that this procedure does not change the size: what you gain on one side, will be lost on the other.
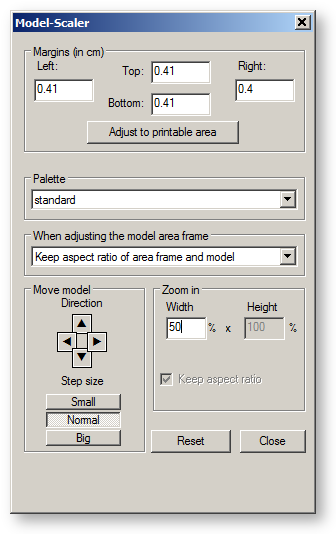
To change the size of the model within the (dashed) area frame, use the "Zoom in" section of the Model Scaler. Unless you deactivate the "Keep aspect ratio" flag, the enlargement for width and the height will be the same. After typing in the zooming factor, you have to perform a mouse click somewhere outside the Model Scaler. Then your changes will be activated.
The "Reset" button of the Model Scaler discards the changes that were performed within the Model Scaler and a zooming that was performed by drawing a frame with the right mouse button. It does not reset the positioning modifications outside of the Model Scaler (for this purpose, use the "Reset Model" button from the print preview main menu).
With the "Close" button, you close the Model Scaler and leave the "Advanced" mode. Note that the setting of the "Release Aspect" flag still remains active.
There are three types of objects that may be inserted to the print preview layout:
Use the corresponding buttons "Insert Text", "Insert OLE" and "Insert Excel-Text" to create a new object. If you activate "Modify Text/OLE", you are able to select any of these objects with a left mouse click (the selection will be indicated by a red frame) and modify the corresponding object by double-clicking on it.
Simple text blocks are available for compatibility reasons. Excel text blocks are more comfortable.
These text fields update themselves with data from the current profile.
When you click on "Insert Text", the Text Field dialog is opened.
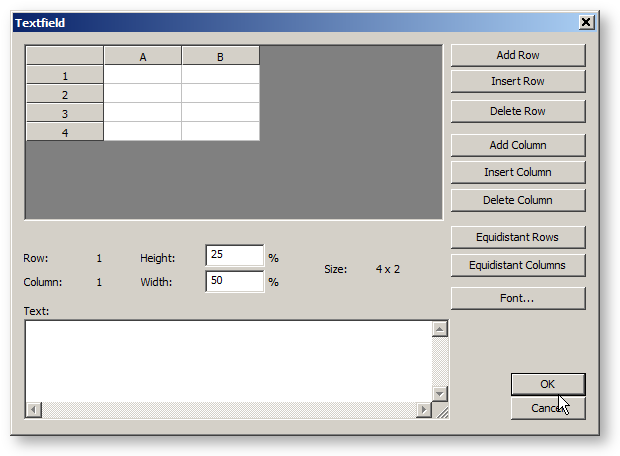
To insert text, select a cell in the table and type the text into the edit field at the bottom. You can add/insert/delete rows and columns with the corresponding buttons.
For each cell, you can define the relative height and width (as a portion of the total height and width) of the corresponding row and column. The bottom most row and the right most column cannot be changed but take the remainder up to 100 %.
The buttons "Equidistant Rows" and "Equidistant Columns" restore the initial equal distribution.
With the "Font" button, you can select a font for the selected cell. It is possible to assign different fonts to each cell.
When you click on "Insert OLE", an “Insert Object” dialog is opened that allows you either
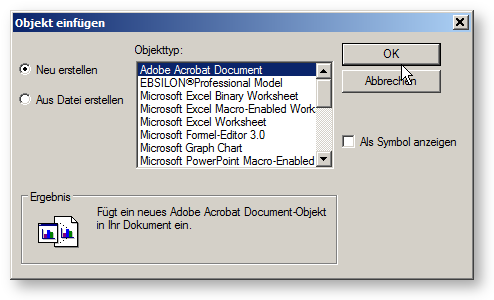
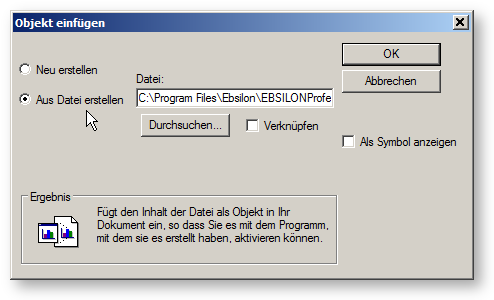
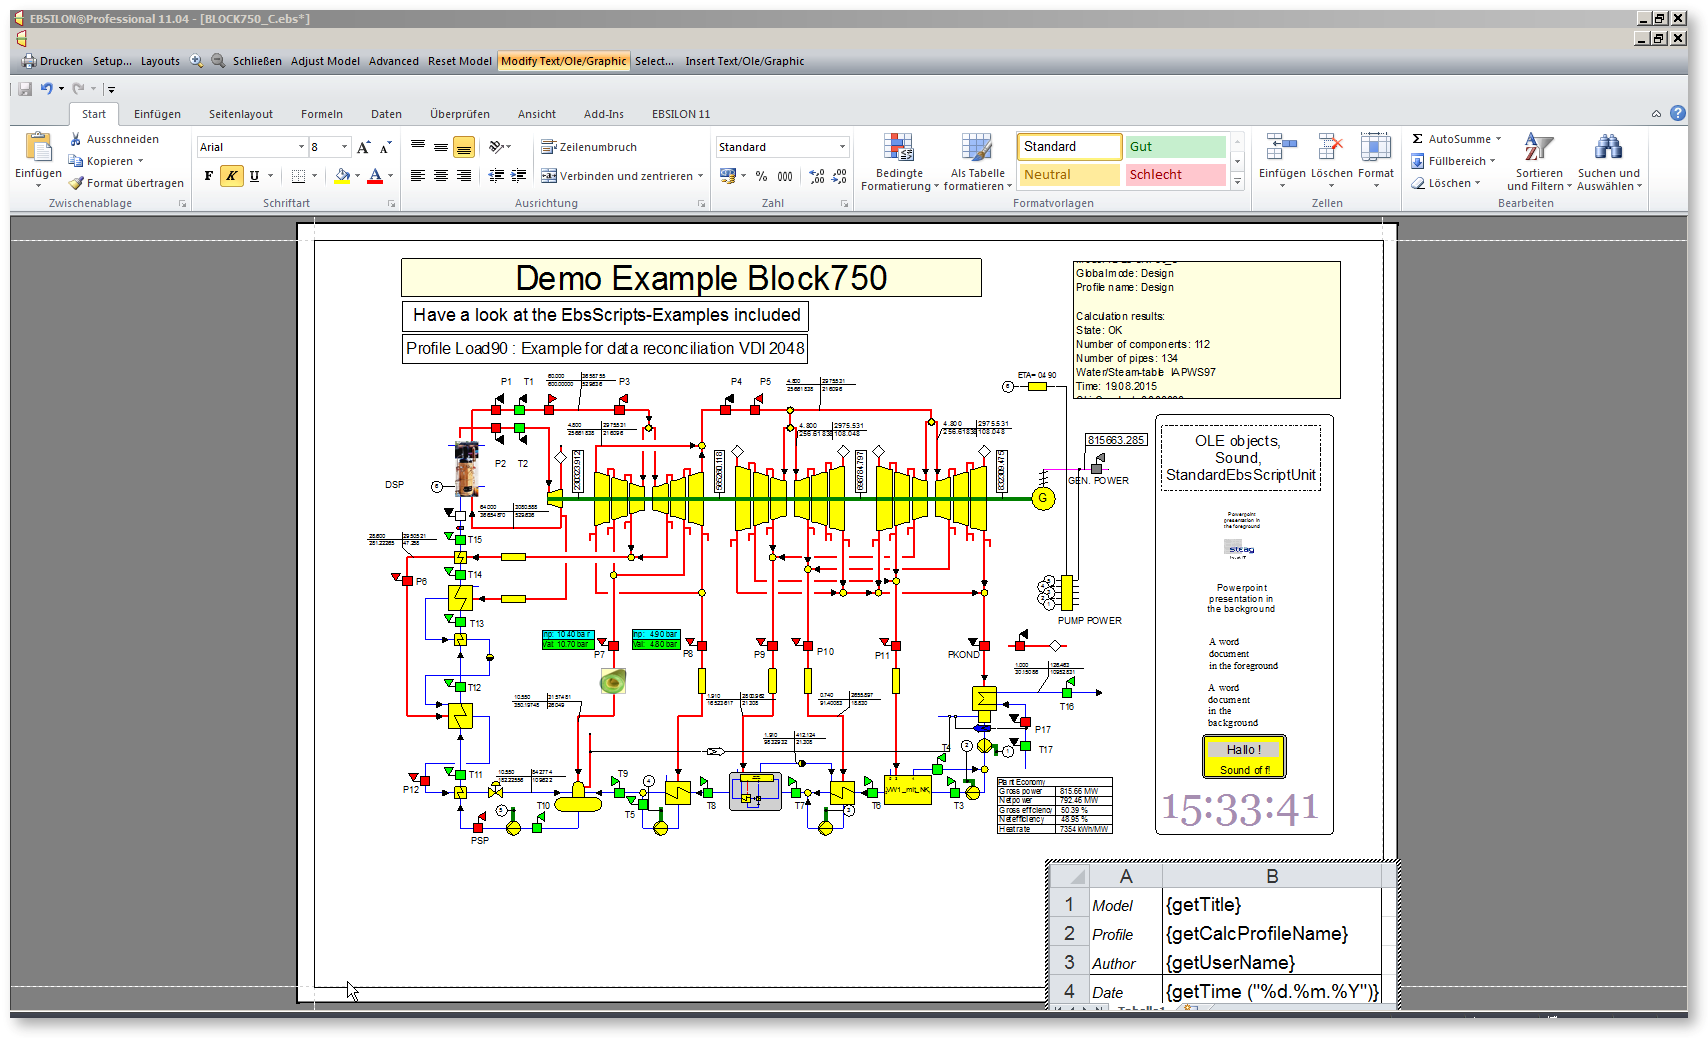
When you click on ”Insert Text/Ole/Graphic”,it is possible to insert graphical objects (rectangles, polygons, images, text fields (with EbsScript evaluation) in the print preview. The positioning while editing the objects has been improved.
When you click on "Insert Excel Text", Excel is started and displays
within the EBSILON®Professional print preview. You can work now within Excel as usual: insert texts to the cells, use the formatting commands, even perform calculations.
Note that you can use Excel functions as well as EbsScript functions at this place. The Excel function will be evaluated within Excel as usual.
EbsScript functions have to be included in brackets { } and are evaluated when you return back to EBSILON®Professional. The syntax is the same that is just in text fields in the model.
To return to EBSILON®Professional, just click somewhere outside the range of the Excel cells.
You create your plot frame within a specific document. Nevertheless, you may want
This is possible by using the layout management. When you click on the "Layouts" button, the "Print Layouts" dialog appears. It displays a list of all plot frames (also called layouts) that are defined within your document.
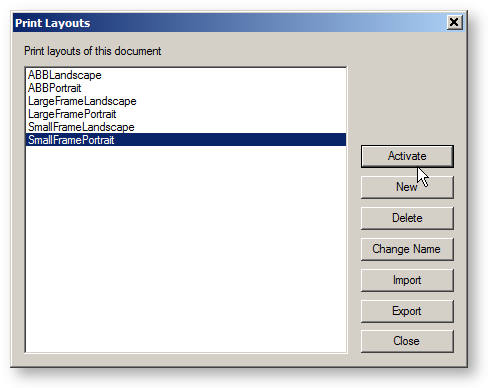
Use the "Activate" button to switch to a selected layout. The Print Layouts dialog is closed automatically.
Use the "New" button to create a new layout. You are asked to type in a name for this new layout. Then you have to activate it to work on it.
Use the "Delete" button to delete a layout.
Use the "Change Name" button to rename a layout.
When you click on "Import", a "File Open" dialog appears where you can select an EBSILON®Professional Print Layout file (".epl"). When you click on "Open", you are asked to specify a new name for this layout. Then this layout is added to the list and you may activate it.
When you click on "Export", a "File Save As" dialog is opened. You are asked, to select a path and specify a file name to store the layout. When you click on "Save", a file with the extension ".epl" (EBSILON®Professional Print Layout) is created. This is a binary file containing all layout information:
It does not include information about the model itself. Therefore, it is possible to reuse the layout for another model.
Note that the modifications that you perform within the layout dialog are just stored within the document (except "Export"). They are not stored to disk unless you save your model file.
The "Print" button opens the "Print" dialog where you can select the printer the shall be used. Depending on your printer driver, certain settings can be modified at this point. When you click "OK" in this dialog, you model is printed.
The "Setup" button opens the "Print Setup" dialog where you can select a printer and perform certain modifications on the printer settings, depending on your printer driver. When you click "OK" in this dialog, the setup dialog is closed without printing, but EBSILON®Professional redraws the picture due to the current printer settings (e.g. the picture is drawn in portrait format instead of landscape if you changed this setting).
In the first group of buttons, there are three more buttons:
The "Zoom in" and "Zoom out" buttons allow a zooming of the print preview as it is displayed on the screen. This zooming does not change the appearance of your printout. It just can be used to enlarge details on the screen. There are only a few discrete steps of zooming.
The "Close" button is used to leave the print preview. After closing, EBSILON®Professionalremembers of the modifications that you made in the preview and will use this settings for the next printing, even if you do not open the print preview again.